I have been experimenting with recipes for New York style cheesecake for many years and the challenge was the balance between supreme creaminess and keeping calories on the low side. When one substitutes the full fat cheese with other ingredients (e.g. starches), one gets a more pudding-like cheesecake, still delicious, but not the creamy, velvety texture I am after. Another challenge was finding the perfect technique to make sure the cheesecake doesn’t crack when done. Finally, this recipe covers it all.
The secrets to a great cheesecake are:
- Use full-fat, good quality cheese.
- Take the time to really mix the cheese and the sugar until creamy, smooth and fluffy.
- Bake it on low temperature and take out of the oven when the centre is still a bit wobbly.
- When you take it out of the oven, run a spatula between the cheese and the sides of the pan, so that when the cheesecake cools down, the sides of the pan do not stretch and tear it out.
- And lastly, let it rest in the fridge for at least 6-8 hours, the flavour develops and you will get a really superb taste. If you rush it, it will not be the same, so do yourself a favour and wait for it :). This is actually an advantage, when hosting, as you can prepare it in advance and it will actually be better with time.
New York Style Cheesecake
Ingredients
Crust
- 200g tea biscuits
- 150g melted butter
Filling
- 1tbsp lemon zest / 8 lemon oil drops
- 195g sugar
- 30g flour
- 900g cream cheese (I use 2 packets Philadelphia Original)
- 5 large eggs at room temperature
- Vanilla extract
- 100ml heavy cream
Directions
Preparing the crust
- Melt the butter.
- Crush the cookies. I put all of them into a big freezer-size ziplock and roll over them with a rolling pin until only small crumbs are left.
- Combine the two until the butter is absorbed evenly.
- Spread this mixture evenly on the bottom of a baking pan and make sure that about 3-4cm of the pan sides are covered as well. Make sure there are no holes, as the filling will run through.
- Put in the fridge to cool for about 15 min.
Filling
- Mix the lemon oil drops into the sugar.
- Mix the cream cheese and sugar with a hand mixer on a low speed until really creamy.
- I prefer hand mixer in this case instead of a standing one, as the hand mixer gives better control in this case to reach the bottom and sides of the bowl and you don’t need to stop and scrape the sides and the mixer beaters constantly.
- Add the eggs one by one to the cheese and mix each one well before adding the next.
- Add the flour and continue to beat the mixture on low speed.
- Add the vanilla extract.
- Add the heavy cream and continue to mix with the mixer for another 2-3min until super creamy and fluffy.
Baking the cheesecake
- Start your oven at 250F/180C.
- Take the crust out of the fridge and pour the filling over it.
- Make sure that it is evenly distributed and even out the top.
- Put it on a sheet pan and put in the oven.
- Bake at 250F/180C for 15 min.
- Reduce the temperature to 250F/120C and bake for about 60 min.
- You may need more or less time depending on your oven. What is important to watch for is that the sides of the cake are dry but the centre (about 10cm in diameter) is slightly wobbly when you shake the pan gently.
- Take out of the oven. This will ensure the cake stays moist and doesn’t crack.
Another important aspect of the good technique is to run a silicon spatula between the cheese and the side of the pan while still warm, so that when the cake starts to cool down and shrinks, it does not stick to the side of the pan and cracks.
Let cool down completely and put in the fridge for at least 6-8 hours before consumption. The longer it stays in the fridge, the more solid the texture becomes and the flavours develop.
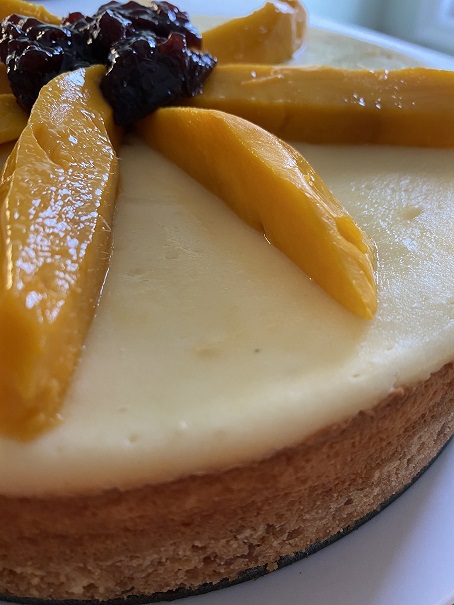
You can decorate with fresh fruit, fruit sauce or simply leave as-is. Enjoy!
